Decided to do a make-up post because MOST of my make-up can be considered as drug store make-up. I'm not an expert, so please excuse if my style is not professional. I'm just someone who likes experimenting with different brands and sharing my finds with you. ^^
Anyway, today I had a bit of time, so I managed to catch some snaps for this post. Usually I'm in a rush / my boyfriend is already waiting for me outside my house, so I have to dash. This make-up was suitable for a daytime look, as we were going to meet up with his best friend's wife who just came back from America. Was wearing my 3/4 "londeh" pants from Kitschen and a t-shirt. I wanted a fuss-free look which was not TOO simple...
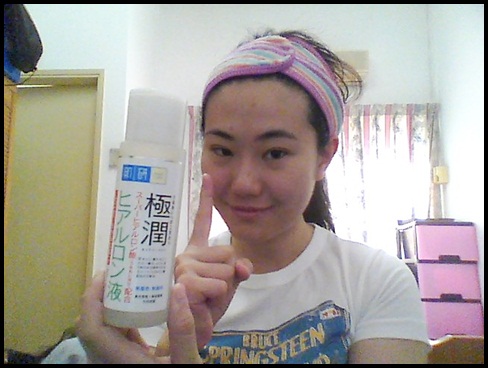
 I need to put my fringe up to do my make-up. My RM3 hairband from Aeon pharmacy is a blessing at times like this. ^^ And after I put my hair up, you can clearly see my pimples and such. Sigh...!

1) MOISTURISE!
After cleansing the face and putting the hair up, my first step is to moisturise. Here, I'm using my gradually depleting bottle of Hada Labo face moisturiser. Just need 2-3 drops. Rub it between your hands to spread it out, and then pat on to your face. Wait a while for the product to get absorbed before proceeding to the next step.
 I look like I'm in great pain here. Whoever said that watching a woman do her make-up is sexy is severely mistaken. This is SERIOUSBUSINESS!
 And then we're done! Good? Good.
 2) MEDICATE
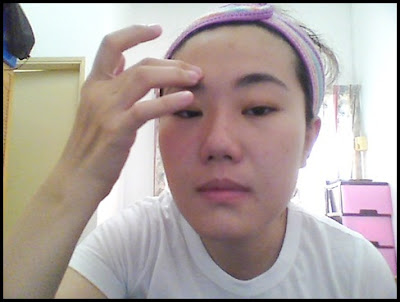
As mentioned, I have a few pimples at the moment. It's not that serious (making my face look like crater of the moon), but it's quite apparent (cannot hide it with fringe). I want to continue to treat the pimples even though I'll be wearing foundation, so I always wear the pimple medication FIRST, then layer the foundation on top. I still use my Oxy Cover because it's flesh tone, it hides under the foundation better.
 Target and destroy!!
 3) BUILDING UP A BASE...
Time for mineral foundation! I love mineral foundation, especially Everyday Minerals, but I've run out of mineral powder from that brand. Instead, I'm now using my very last bits of Boots No. 7 mineral powder that I bought when I was in Thailand in "Buff" shade. Actually it's a little bit TOO dark for me, so I mix it with some samples I got from Everyday Minerals last time. My true EM shade is "Light Olive", but just for samples, I got some which were too fair for my skintone. So when I mix it with the Boots "Buff" shade, I got something pretty good! This is why I like mineral foundation... you can mix and match if you don't get the perfect shade. Can't say the same about normal foundation, right?
 Just sprinkle it out onto the cover, and then put on your face with a kabuki brush. Don't forget your neck!

 4) MAKE YOUR EYES POP
Well, technically, my small eyes will never be able to "pop", but instead of letting them stay dull and unattractive, a spot of eyeliner and eyeshadow never hurt anyone. I only break out my Nyx palette during the weekends. The strong pigments are just too colorful for the office!
 Today I'm using my 10 Eye Color palette from Nyx - The Runway Collection...
 I'll be using the yellow for the base, and the plum to mix with it. That might sound very weird (yellow + purple?!), but actually it's not glaring if you blend it all in. The plum is not a deep purple, but a light shimmery one, so most people might even think it's a beige shade after blending it out, hahaha. Anyway, you can see from the mirrored reflection on my eyeshadow palette that I have a lot of bottles in the foreground! Hahaha, I'm a skincare freak! :P

One eye is done! See? Very light base...
4) MAKE YOUR EYES POP IIIt's not enough to just put on some color... for small eyed freaks like me, we need some eyeliner too. I'm forced to use my Maybelline Gel Eyeliner... and I say "forced" because at the moment the gel seems to be.... hardened. It's harder to draw when previously it used to just slide on. But it's pretty pricey and I don't want to buy a new eyeliner when there's still 80% left of this one. I did stop using the gel eyeliner at one point because I bought 2 In2It liquid eyeliners. In2It liquid eyeliners were good AT FIRST, but then I realised they are not very long lasting, and have a tendency to FLAKE OFF when it dries. The flakes will get into my eyes and irritate them to no end.
Maybelline Gel Eyeliner is really good - long lasting and lasts through tears (from yawning too much wtf), but the main gripe I have about this (which led to me buying the liquid eyeliners from In2It) is that you HAVE to clean the brush out after every application, which is just so bothersome. If you don't clean it out, it WILL harden and make every application after that PAINFUL as it's SCRAPING a brush on your eyelid. Anyway, I'm wondering how I can revive my gel eyeliner, as I remember it being silky smooth the first time I bought it. I read somewhere I can heat it up and it'll be all better. Will update how that goes!

How I look like when only one eye is done... can see the difference? I admit it's not a HUGEEEE difference because I didn't put fake eyelashes or put more dramatic eye makeup, with highlights and stuff:
 5) COLOR IN YOUR LIPS
Meeting boyfriend = no lipgloss day. Used to be a lipgloss collector, I promise you, I have more than 10 tubes of lipgloss. They have not seen the day whenever I meet up with Tron because he hates the feeling of stickiness on his face when I kiss him. Hahahaha! :X So since it's lipstick day, I use my go-to color. I like this shade from Maybelline - Cosy Tangerine from their Color Senstational Moisture Extreme range. It's good for the office or on days when you don't want your lips to be the main attention. Coral shades are also more suitable for my skintone...

After! Woo... nearly there now:

You can see that my lips don't look so pinkish right now. Heck, if you compare with the first pic on this page, it's like I was dead and then I became alive! -__-
6) MAKE YOURSELF BLUSHUsually, I don't use this step unless I'm wearing foundation (yes, there are times I go out without foundation, days when I know I'm only stepping out for a while, or when I know that I'll be out a LONG LONG TIME and wasting my precious remainding mineral foundation ain't worth it. ;P). If I don't wear blusher when I'm wearing foundation, the face looks a little "flat". To add dimension, highlight the cheekbones!

Today I'm using Dandelion from Benefit. It's a very light pink blusher shade that I got for free from some contest that I won. *shrugs* It's good for light day make-up, nothing very dramatic. Just gives you a healthy pink glow. By the way, I don't subscribe to the whole "smile really big and put blush on the apples of your cheeks" method anymore. I do the "brush upwards and highlight your cheekbones" method as a make-up artist once said that when you grow older, the more you smile when applying blusher, when you DON'T smile, it looks like everything is sagging! This is so true, you have to try it for yourself.
If you are still using the "apples of the cheeks" method, try the cheekbone highlighting method and see what a difference it makes! It made a difference for me!

Er... though you are NOT smiling, you don't have to be frowning like I am, hahahaha. I'm just being very SERIOUSBUSINESS about everything. :)
7) ADD A TAD MORE DRAMAOkay, to be honest, I usually skip this step too, because I don't usually need it. Whether I use this or not, it doesn't seem to make a difference. I'm talking about MASCARA. Those who use fake lashes will be blasphemed at what I say, but although it looks a TAD better with mascara, I generally don't see the difference. Or should I say, the difference is not even worth the 30 seconds it takes me to put this on. =p I'm currently using Boot's No.7 Dream Lash mascara that came as a free gift.

It does its job, I suppose... actually, I can't see a difference. Hahahaha!
 8) HEAD ON OUT


 I have high hopes for the Rimmel Mono Eyeshadows because I've just had a really good encounter with the Rimmel True Match foundation (mentioned here). I was so excited when I found out that Yuberactive said that I could review the mono eyeshadow FOR FREE. I was so excited...
 Swatch (you can see it is definitely more fuschia here!) :
 I know that there are plenty of blogs which will show you some highly technical and fancy eye make-up you can do with pink eyeshadow, but since I'm an amateur, I'll just share how I used my eyeshadow.
 On the way to my mother's birthday celebration
 Close up of the pinkish-purplishness. Do forgive the crooked eyeliner... I was in a rush. :p

 Proof that it was really for the office! Hahaha... I might re-do this look for a FOTD to explain what products were used. :)